In the previous article, we have set up the environment of the TANG PriMER FPGA development board from SiPeed, and have confirmed the logic synthesis and writing of the samples. In this article, we will start to synthesize the RISC-V processor, write it to the FPGA, build the software using Arduino IDE, and write it to the ROM on the board. TANG PriMER FPGA development board Logic Synthesis of RISC-V E203 Core and Writing to FPGA The first step is to synthesize the RISC-V core (Tang_E203_Mini). Download the necessary files from the following link. https://github.com/riktw/Tang_E203_Mini Launch the FPGA development environment TD, open the project file e203egmini_new.al from the Open Project menu, and execute the logic synthesis by clicking Process → Run. Setting up the software development environment Next, let’s set up the RISC-V software development environment. This time, we will build software with Arduino IDE and write to Flash using
Read moreTag: RISC-V
Trying Sipeed TANG PriMER [1] – Setting up the development environment
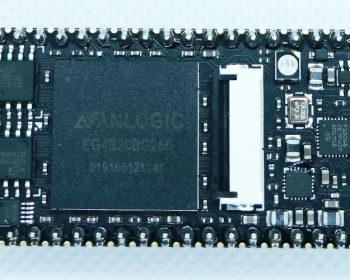
I got a TANG PriMER FPGA development board from SiPeed in China. This page describes the setup and usage of the environment. Sipeed TANG PriMER FPGA Development Board The Sipeed TANG PriMER FPGA Development Board is a small FPGA development board equipped with an Anlogic EG4S20 FPGA, supporting the Hummingbird RISC-V softcore. The main hardware specifications are as follows – FPGA: EG4S20BG256 Logic unit: 20K (LUT4/LUT5 hybrid architecture) – SRAM: approx. 130KB – SDRAM: 64Mb – Flash: FPGA configuration flash, 8Mbit user flash, nor/nand option – Download & debug: On-board FPGA JTAG download debug (RV debug is used for hummingbird core debug) – Interface: FPC40P socket, RGB LCD, nor/nand — FPC40P socket, RGB LCD, can be connected to VGA adapter board — FPC24P socket, connectable to DVP camera, high speed ADC module — Resistive touch screen (RGB LCD) controller (I2C communication) Download and setup the IDE Download the IDE from
Read more